Cross-platform development has always been a hot topic. As a front-end developer, it's beneficial to understand some knowledge about mobile platforms. This article will briefly introduce some common basic knowledge and concepts of Android.
I. Environment Setup
Android environment setup is relatively simple. Generally, after downloading Android Studio from the official website, you can successfully compile a Hello World project. During this process, the Java environment and some Android SDK dependencies are automatically configured. However, to use commands like adb and java in the command line, you need to configure some environment variables:
export ANDROID_HOME=~/Library/Android/sdk
export JAVA_HOME=/Applications/Android\ Studio.app/Contents/jre/jdk/Contents/Home
export PATH=${PATH}:${ANDROID_HOME}/tools
export PATH=${PATH}:${ANDROID_HOME}/platform-tools
export PATH=${PATH}:${JAVA_HOME}/bin
The most commonly used command line tool is adb. ADB is very powerful. When you plug an Android phone into your computer, you can use adb to perform some common operations, saving time. If you only want to use the adb command, you don't need to download the entire Android Studio. You can find an adb file and put it in your environment variables to use it. The prerequisite is that USB debugging is enabled in the Android phone's developer options.
Examples of common adb commands:
adb install path/to/apk # Install the APK file from the corresponding directory on the computer to the phone.
adb shell # Directly enter the phone's shell environment, where you can view the phone's file contents, performance status, kill processes, etc. (many Linux commands can be used)
adb push path/to/file /sdcard/ # Transfer files from the computer to the phone (e.g., transfer a movie)
adb pull /sdcard/file ~/movie/ # Transfer files from the phone to the computer

### You can also simulate gestures: (To view specific coordinate values, open Developer Options -> Pointer Location)
adb shell input tap 100 120 # Simulate a tap at the screen position with x-coordinate 100 and y-coordinate 120
adb shell input swipe 0 1000 800 600 # Simulate a swipe from position (0,1000) to (800,600)
adb shell input swipe 100 200 100 200 500 # Simulate a long press at position (100,200) for 500 milliseconds
Tip: A good use of adb gesture simulation is (
automated testing) automatic game playing. For some mindless mobile games, you can simulate gestures to automate grinding. For example, when playing Onmyoji and grinding PVE dungeons, there's actually very little player interaction, but you can't skip it. You can create an adb command script to automatically click. This way, you can watch shows or do other things while leaving your phone to grind.
In addition to the adb commands mentioned above, there are many others, such as rebooting the device, stopping applications, starting applications, viewing installed application lists, checking battery status, taking screenshots, recording the screen, and so on. Interested readers can explore further --> Common adb commands
II. Project Directory Structure
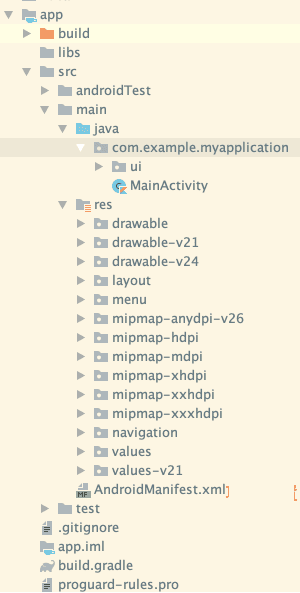
For example, this is a created Hello World project. The code is mainly written in the Java directory, and the res directory is used to store resource files such as images and layout XML files. In Android, implementing many styles is not as easy as in CSS. For instance, shapes like rounded corners actually need to be defined in a separate XML file. Another example is handling button press and release states: in CSS, you just need to add a selector, but in Android, you need to create a configuration file called selector XML to configure it.
If you look closely at the screenshot, you'll notice that the drawable directory names are followed by parameters like v21/v24, hdpi/mdpi/xxhdpi, etc. This is not due to laziness in naming, but for adapting to different platforms and sizes.
For example, v21 refers to Android system version 21, which corresponds to Android 5.0. In this directory, you can use new methods for Android 5.0, which are effective for devices with version 5.0 and later. This way, when adapting to different versions of devices, you can place configuration files with the same filename in each directory. The system will automatically read the appropriate file based on the device, allowing new devices to use new features while avoiding exceptions on older devices.
xhdpi exists for similar reasons, to adapt to different screen resolutions. Devices with higher screen resolutions use larger, clearer images, while devices with lower screen resolutions use smaller images, which are sufficient and save computational performance. However, placing an image in each directory would significantly increase the installation package size, so generally, images are only placed in one directory.
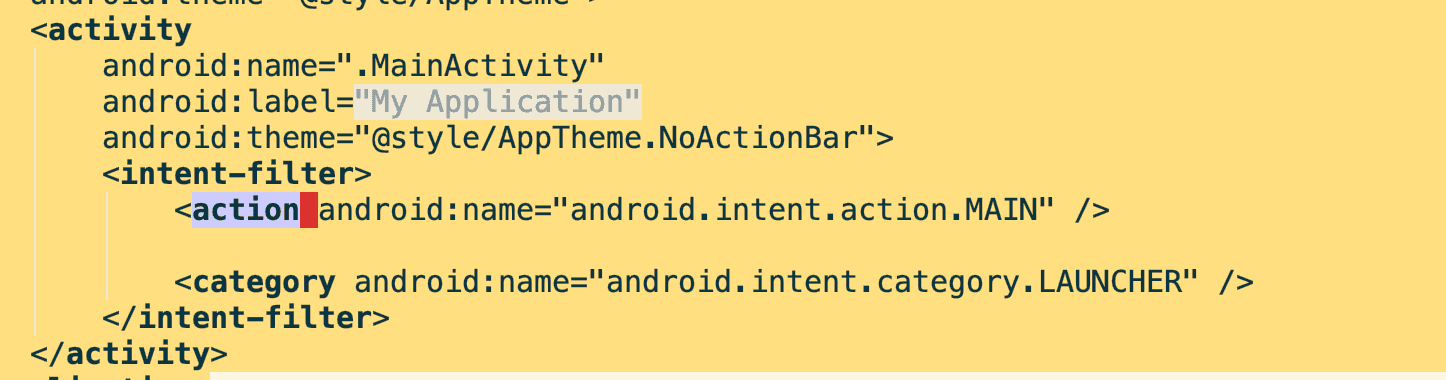
The AndroidManifest.xml below is a crucial configuration file. All Activities need to be declared in it to be used, and many static system broadcast listening methods are also executed in it.
For example, the following image shows a common configuration in AndroidManifest.xml: letting MainActivity listen for startup notifications, so that MainActivity will start when the App icon is clicked.
III. Dependency Management with Gradle
Gradle is based on the groovy language and is mainly used to manage dependencies and build processes in Android projects.
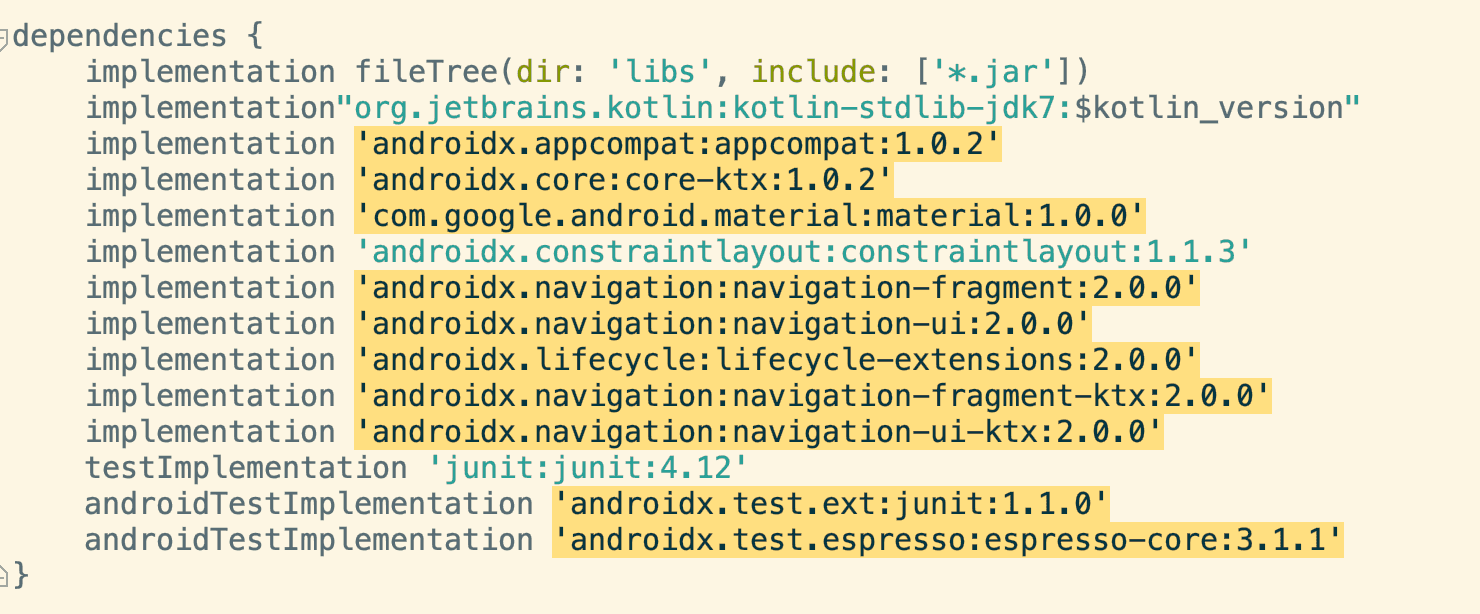
Common dependency management: For example, if you open the build.gradle file under the app in the Hello World project, it specifies which libraries are depended on. These libraries will be downloaded locally during the build process. Generally, dependent libraries are stored on Maven. Of course, you can also depend on local jar/aar resource packages. For example, the first line below depends on all .jar files under libs.
Sometimes, for the sake of logic unification and reuse, some code modules are extracted into separate modules. For example, in our app, rooms and homepages are extracted into separate modules because they are complex, and basic components like webview, download, csc, and other reusable components are also extracted into modules. These are then referenced by other modules. The referencing form is similar to importing external libraries.
As shown in the image below, flutter and webview are imported:
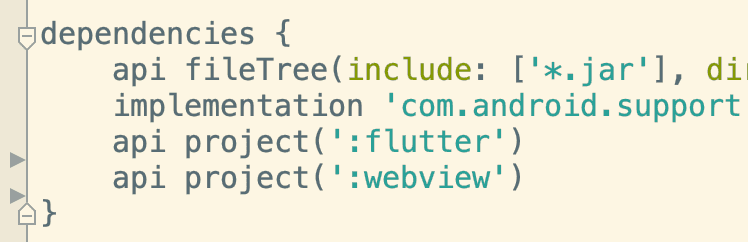
The referenced modules use a plugin called com.android.library, indicating that it's a library that can be used. The top-level module of the app uses a plugin called com.android.application, indicating that it's an app.
There are two key words for Gradle imports here: implementation and api.
The main difference between the two is:
implementation dependencies are not transitive. For example, if component A references component B, and component B references component C. With implementation, A cannot use C's methods and is unaware of C.
api dependencies are transitive. In the same scenario, if B's import of C is api, A can directly use C's methods.
The official recommendation is to use implementation to depend on modules. This way, when lower-level modules change, the impact on upper-level modules is smaller during compilation, which can speed up the compilation process.
Gradle has many other functions besides handling dependencies:
Configuring app parameters:
 compileSdkVersion 29
 buildToolsVersion "29.0.2"
 defaultConfig {
        applicationId "com.example.myapplication" //package name
        minSdkVersion 15 //minimum supported system version. 15 corresponds to Android 4.0.3
        targetSdkVersion 29
        versionCode 1
        versionName "1.0"
 }
Building different types of APKs simultaneously: For example, because Android devices have different architectures like x86, armeabi, mips, etc., if all the underlying so libraries are packaged together, the APK will be very large. You can configure Gradle to compile APKs for different types simultaneously, so users only need to download the corresponding type.
Code compression: You can use ProGuard to compress the code, changing long names to meaningless short names. However, for class names like Activity, which are declared in AndroidManifest.xml, they cannot be modified arbitrarily, so ProGuard can also configure a whitelist for obfuscation, not obfuscating special class names.
Signing the app: Generally, signing is also configured in Gradle. When you need to publish to app stores, you need to sign the app. The significance of signing is that it can detect unauthorized modifications to some APKs. When users install app upgrades, they must have the same signature to upgrade successfully.
IV. Four Major Components
Android has four major components: Activity, Service, Broadcast, and ContentProvider. These four are very important parts of the Android system.
Activity is used for page display, and basically every page in an app is an Activity. It provides some necessary lifecycles for developers to use. For example, in our App, the homepage, room, personal center, etc., are all Activities. The full-screen webview we usually open is also a separate Activity. Activity provides a stack. When one Activity opens another Activity, the new one is pushed onto the stack above the old one. When the user presses the back button, these Activities are popped from the stack and displayed in order. For example, the JsBridge backToWebView(index) provided by the client can go back to previous pages, and the principle is to hold these intermediate Activities. According to the index parameter, it closes several Activities from the top of the stack.
Service, as the name suggests, is a service. Activity provides interface interaction, but after closing the interface, the Activity will be destroyed. Some logic that needs to run for a long time needs to be handed over to the service. For example, users downloading and uploading files for a long time, playing music, etc. For instance, our App's network requests and IM notifications are all done in a separate Service.
Broadcast is designed to satisfy communication between Android applications and the system, as well as between Android applications. Sending and receiving broadcast messages is similar to "publish-subscribe". Only subscriptions that have declared the need for corresponding broadcasts can receive them. The original purpose of this design was, of course, to better serve users, but many Apps use this feature to keep themselves alive. If you're an Android user, you've probably encountered situations where you turn on airplane mode and immediately turn it off, and an app suddenly sends a push notification. Or you open app A, and app B suddenly sends a push notification. Yes, they achieve this through broadcasts, monitoring system broadcasts and seizing the opportunity to wake themselves up. Or when starting up, they send a broadcast to wake up their brothers and sisters. Of course, Google has also noticed this phenomenon, and restrictions on broadcasts are becoming increasingly stringent in new Android systems.
ContentProvider is a content provider that can encapsulate data and provide a secure data access mechanism. It allows one App to access another App's database. Common examples include accessing contacts, calendars, etc. It can also be used to manage the storage of the application itself. For example, some Apps have multiple processes, and to ensure that the states between processes are synchronized, this can also be used to implement cross-process storage of some state variables.
V. Main Thread
The main thread is also a very crucial concept in Android. Unlike JavaScript, which has only one thread, Java can open many threads and even different processes.
When an APP starts, the system creates a main thread. This thread is mainly responsible for drawing the UI and responding to user interactions. Most of the interaction logic in Android Apps is performed in this thread, so it's also called the UI thread. However, for some time-consuming operations, such as network requests and database operations, they cannot be placed here and need to be performed in separate threads. The Android system has limitations on the response time of the main thread. Generally, if the main thread is blocked for more than 5 seconds, a prompt will pop up on the user interface asking the user whether to force close. This is called ANR (Application Not Responding).
Therefore, there are two restrictions on the main thread:
- Cannot block the UI thread
- Cannot operate UI controls in non-UI threads.
So, what if you want to perform delayed operations? For example, changing text after a 10-second delay. You can't wait in the UI thread, and if you start a child thread, you can't operate the UI. What to do?
Android provides a message loop mechanism for the main thread, so there's something similar to H5's setTimeout for delayed operations. The corresponding class is called Handler, which can be understood as very similar to setTimeout. However, Handler relies on the message loop Looper that has already been created in the thread. The system will create a Looper in the main thread. Other self-created child threads don't have it by default, and you need to create it yourself if you want to use it, otherwise, it will throw an error. Common methods corresponding to Handler include: post(Runnable) postAtTime(Runnable, long) postDelayed(Runnable, Object, long)
Handler is also often used for switching threads. For example, receiving a user response in the UI thread, switching to a child thread to read a database, and then switching back to the UI thread to perform UI operations after reading the result.
This concludes the introduction to Android basics. There will be introductions to other client knowledge in the future. Welcome interested readers to discuss and exchange ideas.
本文首发于 一粟(https://www.zeyio.com),欢迎转载,但是必须保留本文的署名和链接。
本文永久链接:https://www.zeyio.com/en/basic-android-for-web-developer/